








Combine Header Height Sensor: Auto Header Control
Maintaining proper header height is crucial for efficient harvesting. Learn how combine header height sensors work, common problems, and how to keep your machine running smoothly.
Introduction to Combine Header Height Control
The combine header height sensor is a critical component in modern harvesting equipment. It's the linchpin of automatic header height control (AHHC) systems, enabling combines to maintain a consistent cutting height regardless of ground conditions. A properly functioning AHHC system minimizes header losses, improves harvesting efficiency reduces operator fatigue. This article will delve into the workings of header height sensors, common issues, troubleshooting tips maintenance advice to keep your combine operating at peak performance.
Recommended Parts for This Guide
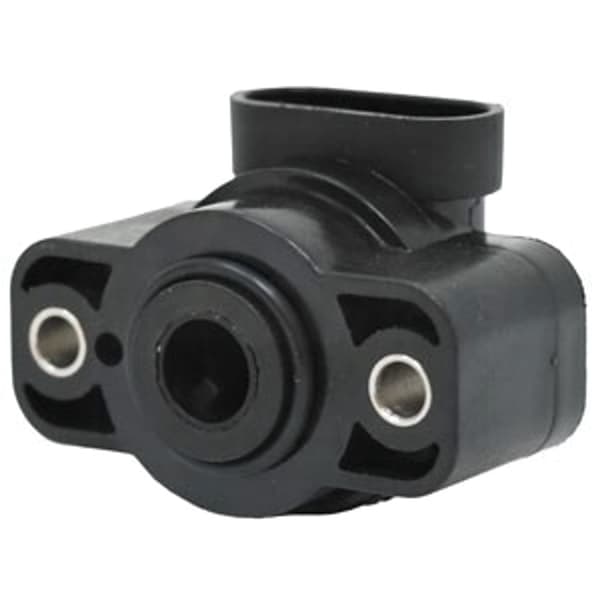
1 part we recommend — in stock, ships fast, one-click add to cart.
🔍 Looking for a specific part? Try our AI Part Finder — tell it your equipment and what you need, and it will find matching parts instantly.
At Madison Tractor Company, we understand the importance of keeping your combine in top condition during harvest season. We carry a wide selection of combine parts, including header height sensors, the sieve shoe frame rail, for all major brands, including John Deere, Case IH, New Holland, Gleaner, Massey Ferguson more. We also stock essential components like combine belts and combine concave to ensure a smooth and productive harvest.
How Header Height Sensors Work
The primary function of a combine header height sensor is to detect the distance between the header and the ground. This information is relayed to the combine's control system, which then adjusts the header's height accordingly. Here's a breakdown of the process
- Sensing Header height sensors typically utilize mechanical feelers (skid plates or shoes) or ultrasonic sensors. Mechanical feelers physically contact the ground and transmit height variations through linkages or potentiometers. Ultrasonic sensors emit sound waves and measure the time it takes for them to return, calculating the distance to the ground.
- Signal Transmission The sensor generates an electrical signal proportional to the measured height. This signal is sent to the combine's electronic control unit (ECU) or header control module.
- Control System Response The ECU processes the signal and compares it to the desired header height setting. If the actual height deviates from the setpoint, the ECU sends commands to hydraulic cylinders that raise or lower the header to compensate.
- Continuous Adjustment This process is continuous, allowing the header to follow the contours of the field, maintaining a consistent cutting height minimizing grain loss.
Different manufacturers employ variations of these systems. For example, some John Deere combines use rotary position sensors coupled with skid plates, while some Case IH models use ultrasonic sensors for non-contact height measurement. These systems, however, all function on the same fundamental principle of sensing, transmitting adjusting.
Common Problems with Header Height Sensors
Like any mechanical or electronic component, header height sensors can experience issues that affect their performance. Common problems
- Physical Damage Skid plates can become bent or broken ultrasonic sensors can be damaged by debris or impacts.
- Electrical Issues Wiring can become frayed, connectors can corrode sensors can fail internally.
- Sensor Calibration Over time, sensors can drift out of calibration, leading to inaccurate height readings.
- Hydraulic Problems Issues with the hydraulic cylinders or control valves that raise and lower the header can also mimic sensor problems.
- Software Glitches Rarely, software bugs in the combine's control system can cause erratic header height behavior.
If you experience issues with your header height control system, it’s important to diagnose the problem accurately before replacing any parts. Check for obvious physical damage, inspect wiring and connectors consult your combine's service manual for troubleshooting procedures.
Troubleshooting and Maintenance
Here are some troubleshooting steps you can take to diagnose and resolve common header height sensor problems
- Visual Inspection Carefully inspect the sensors, skid plates wiring for any signs of damage or corrosion. Replace damaged components as needed.
- Wiring Checks Use a multimeter to check the continuity and voltage of the wiring connecting the sensor to the ECU. Refer to your service manual for the correct voltage and resistance values. Clean and tighten any corroded connectors.
- Sensor Calibration Most modern combines have a calibration procedure for the header height sensors. Consult your operator's manual for specific instructions. Typically, this involves placing the header in a known position and using the combine's display to input the correct height reading.
- Hydraulic System Checks Inspect the hydraulic cylinders and control valves for leaks or damage. Check the hydraulic fluid level and condition. Air in the hydraulic system can also cause erratic header movement; bleed the system according to the manufacturer's instructions.
- Software Updates Check with your dealer to see if there are any software updates available for your combine's control system.
Example Troubleshooting Scenario Suppose your John Deere S-Series combine's header is consistently cutting too low, causing excessive stubble. First, inspect the skid plates for damage. Next, check the wiring to the rotary position sensors for breaks or corrosion. Using a multimeter, verify the voltage readings at the sensor connector. If the readings are outside the specified range (refer to the John Deere service manual for the S-Series, often available online or through your dealer), the sensor may need replacement. Before replacing, however, try recalibrating the sensor through the combine's display. If calibration fails or the readings remain incorrect, a new John Deere combine parts height sensor, possibly with an OEM part number like (check compatibility with your specific model year), might be required.
Safety Warning Always disconnect the power to the combine before working on electrical components. When working on hydraulic systems, relieve pressure before disconnecting lines.
Replacing a Header Height Sensor
If troubleshooting indicates a faulty header height sensor, replacement is necessary. Here’s a general guide
- Disconnect Power Turn off the combine and disconnect the battery.
- Locate the Sensor Refer to your service manual to locate the specific sensor you need to replace. They are typically mounted near the header's skid plates or on the header frame.
- Disconnect Wiring Disconnect the wiring harness from the sensor. Note the orientation of the connector to ensure proper reconnection later.
- Remove the Old Sensor Remove the bolts or screws that secure the sensor to the header.
- Install the New Sensor Install the new sensor, ensuring it is properly aligned and securely fastened. Use the correct torque specifications for the mounting bolts. Refer to your service manual for the correct torque values.
- Reconnect Wiring Reconnect the wiring harness to the sensor, ensuring a secure connection.
- Calibrate the System Calibrate the header height control system according to the instructions in your operator's manual.
- Test the System Start the combine and test the header height control system to ensure it is functioning correctly.
Example Replacing a header height sensor on a Case IH Axial-Flow 7120 combine might involve loosening two bolts securing the sensor to the header frame (torque specification: 20 ft-lbs). After installing the new sensor (ensure it’s a compatible Case IH combine parts replacement, perhaps cross-referencing a number like 877654321), the combine's AFS Pro 700 display needs to be used to recalibrate the header height control system. Refer to your Case IH operator's manual for the specific steps.
Preventative Maintenance Tips
Regular maintenance can extend the life of your header height sensors and prevent costly downtime. Here are some tips
- Regular Cleaning Keep the sensors clean and free of debris. Use a soft brush or cloth to remove dirt and mud.
- Wiring Inspection Periodically inspect the wiring and connectors for damage or corrosion. Apply dielectric grease to the connectors to prevent corrosion.
- Lubrication Lubricate any moving parts, such as linkages or pivots, according to the manufacturer's recommendations.
- Calibration Checks Check the calibration of the sensors periodically, especially after making repairs or adjustments to the header.
- Storage When storing your combine for the off-season, protect the sensors from the elements.
Madison Tractor Company: Your Source for combine parts
At Madison Tractor Company, we are committed to providing farmers and ranchers with high-quality combine parts and expert advice. We stock a wide range of parts for all major brands, including New Holland combine parts, Gleaner combine parts, Massey Ferguson combine parts and more! Whether you need a new header height sensor, combine belts, combine concave, radiators, water pumps, starters, alternators, or any other part, we have you covered. Our knowledgeable staff can help you find the right parts for your machine and answer any questions you may have. Browse our online catalog or contact us today to learn more. We're here to keep you harvesting!
Remember to consult related articles in our Combine Harvester Parts & Maintenance cluster, such as John Deere Combine Parts: 9000, S-Series & X-Series, Case IH Combine Parts: Axial-Flow 1400-9200 Series, Combine Belt Replacement: Drive, Feeder & Separator BeltsCombine Concave Replacement: Wire, Round Bar & Slotted for more in-depth information on combine maintenance and repair.
🔍 Can't Find Your Part?
Use our AI-Powered Part Finder to search by your equipment's make, model, and what you need. It's the fastest way to find the exact part for your machine.
Try the Part Finder →Part of our comprehensive guide
Combine Harvester Parts Guide: Pre-Season Checklist & Replacement Parts