








Riding Mower Brake Pads & Brake Disc Kit
Riding mower brake pads are critical for safe operation. This guide covers how to inspect, maintain, and replace your brake pads and brake discs, ensuring your mower stops when you need it to. We'll help you choose the right parts for your John Deere, Cub Cadet, or other brand.
Introduction to Riding Mower Brake Systems
A properly functioning brake system is essential for the safe operation of any riding mower or lawn tractor. Just like the brakes on your car, riding mower brake pads wear down over time and need periodic inspection and replacement. In this guide, we'll walk you through everything you need to know about riding mower brake pads and brake disc kits, including how to inspect them, when to replace them, and choosing the right parts for your machine.
Recommended Parts for This Guide
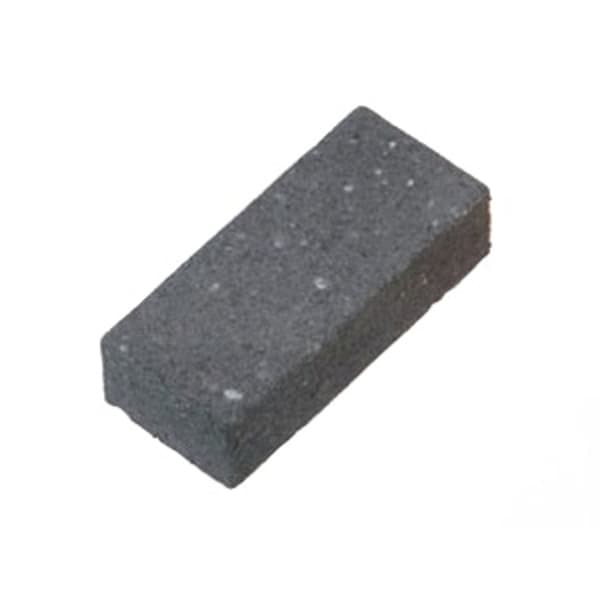
1 part we recommend — in stock, ships fast, one-click add to cart.
🔍 Looking for a specific part? Try our AI Part Finder — tell it your equipment and what you need, and it will find matching parts instantly.
Your lawn tractor's braking system typically relies on a mechanical linkage connected to a foot pedal. When you press the brake pedal, this linkage applies pressure to the brake pads, which then clamp down on a brake disc (also called a rotor) attached to the transaxle. This friction slows down and eventually stops the mower. Understanding this basic principle is key to diagnosing and maintaining your brake system effectively. If your mower also has a parking brake, be sure to check that it is operating correctly as well.
Remember to consult your owner's manual for specific information about your mower's braking system. And before beginning any work, disconnect the spark plug to prevent accidental starting. You should also wear safety glasses and gloves.
Identifying Types of Riding Mower Brake Systems
While the basic principle remains the same, there are some variations in riding mower brake systems:
- Single Brake Disc: Most common on smaller riding mowers. One brake disc is attached to the transaxle, and a single set of brake pads applies pressure.
- Dual Brake Discs: Found on some larger or more powerful mowers. Two brake discs provide increased stopping power.
- Drum Brakes: Older models may use drum brakes instead of disc brakes. These are less common now, but replacement parts are still available.
Whether you own a John Deere, Cub Cadet, Craftsman, Husqvarna, Toro, or any other brand like Ariens, Murray, Hustler, Scag, Exmark, Ferris, Snapper, Simplicity, or Dixie Chopper, understanding your specific brake system is the first step in proper maintenance.
When to Replace Your riding mower brake pads
Several signs indicate it's time to replace your riding mower brake pads:
- Reduced Braking Power: The most obvious sign. If your mower takes longer to stop or the brake pedal feels spongy, your brake pads may be worn.
- Squealing or Grinding Noises: These noises indicate that the brake pads are worn down and the metal backing is rubbing against the brake disc.
- Visible Wear: Inspect the brake pads directly. If they are thin or cracked, they need to be replaced. Most pads have a wear indicator – a small groove or notch – that disappears when the pad is worn to its minimum thickness.
- Uneven Wear: Check both brake pads on the axle. Uneven wear can indicate a problem with the brake linkage or a sticking caliper (if equipped).
Regular inspection of your brake system is crucial. We recommend checking your brake pads at least once a season, or more frequently if you use your mower extensively or in hilly terrain. Remember, timely replacement can prevent more serious (and costly) damage to the brake disc. You may also want to inspect the components of the riding mower drive belt when inspecting the brakes.
Inspecting Your Riding Mower Brakes: A Step-by-Step Guide
Here's how to inspect your riding mower brakes:
- Safety First: Disconnect the spark plug wire and engage the parking brake. This prevents accidental starting.
- Locate the Brakes: Typically, the brake assembly is located near the transaxle. Consult your owner's manual for the exact location. If you need to service your lawn tractor transaxle you may need to access this area anyway.
- Remove the Wheel (if necessary): Depending on the mower model, you may need to remove the rear wheel to access the brake assembly. Use a jack to lift the mower and secure it with jack stands before removing the wheel.
- Inspect the Brake Pads: Visually inspect the brake pads for wear, cracks, and damage. Check the thickness of the pads. If they are thinner than 1/8 inch (3mm), they should be replaced.
- Inspect the Brake Disc: Check the brake disc for signs of wear, scoring, or warping. If the disc is damaged, it may need to be resurfaced or replaced.
- Check the Linkage: Inspect the brake linkage for any signs of damage or wear. Make sure all connections are tight and secure.
- Test the Brakes: After inspecting the brakes, reassemble everything and test the brakes. Make sure the mower stops quickly and smoothly.
Replacing Riding Mower Brake Pads and Brake Discs
Replacing brake pads and brake discs is a relatively straightforward process, but it's important to follow these steps carefully:
- Gather Your Tools: You'll need a socket set, wrenches, pliers, brake cleaner, and new brake pads or a brake disc kit.
- Remove the Old Brake Pads: Depending on the mower model, you may need to remove a retaining clip or bolt to release the brake pads.
- Clean the Brake Assembly: Use brake cleaner to clean the brake disc and surrounding area. This will remove any dirt, grease, and debris.
- Install the new brake pads: Install the new brake pads in the reverse order of removal. Make sure the pads are properly seated and secured.
- Replace the Brake Disc (if necessary): If the brake disc is damaged or worn, replace it with a new one. This may involve removing the wheel hub and axle. If working near the riding mower rear axle seal, inspect its condition too.
- Adjust the Brakes: After installing the new brake pads, you may need to adjust the brakes to ensure proper operation. Consult your owner's manual for specific adjustment instructions.
- Test the Brakes: After replacing the brake pads and/or brake disc, test the brakes thoroughly before using the mower.
Safety Warning: When working on brake systems, wear appropriate safety gear, including safety glasses and gloves. Dispose of old brake pads and brake cleaner properly.
Choosing the Right Brake Pads and Brake Disc Kit
When selecting replacement brake pads or a brake disc kit, it's crucial to choose the correct parts for your specific mower model. Using the wrong parts can compromise safety and performance.
- Consult Your Owner's Manual: The owner's manual will provide the correct part numbers for your mower's brake pads and brake disc.
- Match the Part Numbers: Compare the part numbers in your owner's manual to the part numbers listed on the brake pads or brake disc kit.
- Consider Quality: Choose high-quality brake pads and brake discs from reputable manufacturers. Aftermarket parts may be cheaper, but they may not provide the same level of performance or durability as OEM (Original Equipment Manufacturer) parts.
At Madison Tractor Company, we offer a wide selection of brake pads, brake discs, and complete brake disc kits for various riding mower brands, including John Deere, Cub Cadet, Craftsman, Husqvarna, Toro, Ariens, and more. Whether you need brake pads, blades, spindles, pulleys, filters, spark plugs, bearings, shear pins, or any other part, we have you covered. We also carry hydrostatic transmission fluid for your transmission maintenance.
Maintaining Your Riding Mower Brakes
Proper maintenance can extend the life of your riding mower brakes and ensure safe operation:
- Regular Inspections: Inspect your brake pads and brake disc regularly for wear and damage.
- Keep the Brakes Clean: Clean the brake assembly regularly to remove dirt, grease, and debris.
- Lubricate the Linkage: Lubricate the brake linkage to ensure smooth operation.
- Adjust the Brakes as Needed: Adjust the brakes as needed to maintain proper braking performance.
By following these tips, you can keep your riding mower brakes in top condition and ensure safe operation for years to come. Don't forget that other drive system components like lawn tractor wheel bearings play a part in overall safety and stopping performance.
Conclusion
Maintaining your riding mower's brake system is crucial for safety. By understanding the components, knowing when to inspect and replace parts, and following proper maintenance procedures, you can keep your mower running smoothly and safely for years to come. Remember to always prioritize safety and consult your owner's manual for specific instructions related to your mower model.
At Madison Tractor Company, we are dedicated to providing high-quality parts and expert advice to help you keep your outdoor power equipment in top condition.
Shop Riding Mower Parts at Madison Tractor Company!
Need new riding mower brake pads or a complete brake disc kit? Browse our extensive selection of parts for all major brands, including John Deere, Cub Cadet, Craftsman, Husqvarna, and more! Shop Now! You can also use our AI-Powered Part Finder to search for parts by your specific make and model.
Part of our comprehensive guide
Mower Transmission Parts Guide: Transaxle, Drive Belt & Bearings