








Riding Mower Headlight Bulb: Size & LED Upgrade
Learn how to find the right riding mower headlight bulb, replace it safely, and even upgrade to LED for brighter, longer-lasting light. We'll cover common sizes and compatibility with brands like John Deere, Craftsman, and more.
Visibility is key when operating your riding mower, especially during early mornings, late evenings, or in areas with limited natural light. A functioning headlight is crucial for safety and precision. This guide will help you understand the types of riding mower headlight bulbs, how to replace them, and even explore LED upgrade options to improve your mower's illumination. We'll cover common issues and solutions to keep your lights shining bright.
Recommended Parts for This Guide
3 parts we recommend — in stock, ships fast, one-click add to cart.
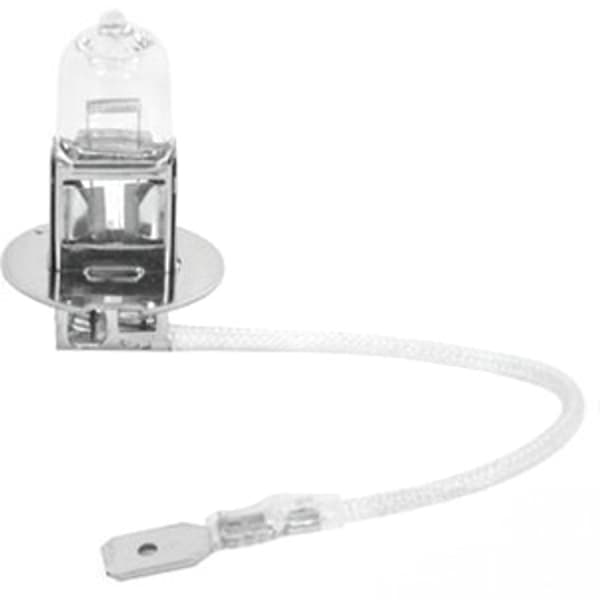
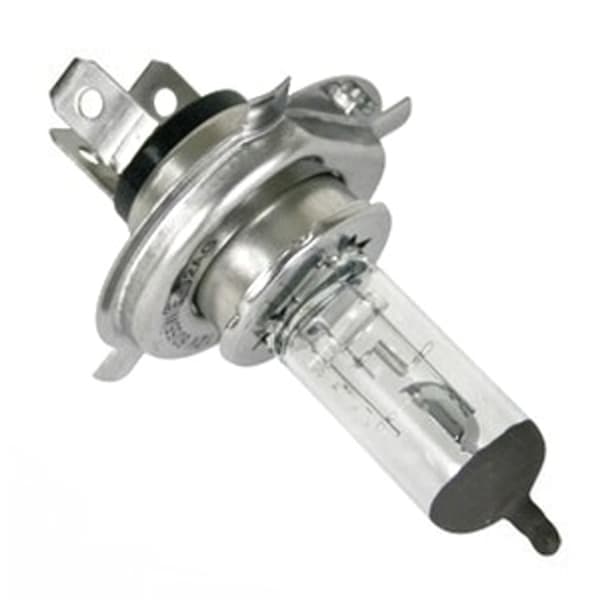
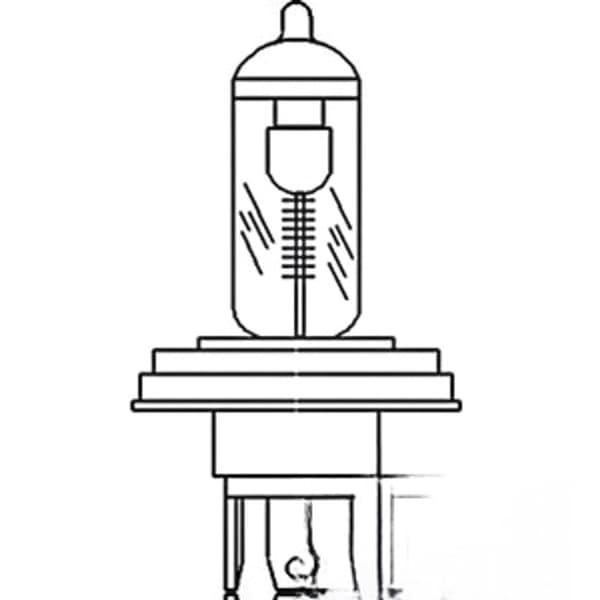
🔍 Looking for a specific part? Try our AI Part Finder — tell it your equipment and what you need, and it will find matching parts instantly.
Common riding mower headlight bulb Types
Riding mowers typically use several types of headlight bulbs, each with different characteristics. Understanding these differences is important for choosing the right replacement.
- Incandescent Bulbs: These are the most traditional type, offering a warm, yellowish light. They are generally inexpensive but have a shorter lifespan and are less energy-efficient than other options.
- Halogen Bulbs: Halogen bulbs produce a brighter, whiter light compared to incandescent bulbs and have a slightly longer lifespan. They are a good middle-ground option in terms of cost and performance.
- LED (Light Emitting Diode) Bulbs: LEDs are the most energy-efficient and longest-lasting option. They provide a bright, clear light and are more resistant to vibration, making them ideal for the rugged conditions of lawn mowing. LED upgrades are becoming increasingly popular.
Common bulb bases you might encounter include bayonet (BA15S, BA15D), wedge (T10, T15), and festoon types. Identifying the correct base is crucial for a proper fit.
Identifying Your Riding Mower Headlight Bulb
Before you can replace your riding mower headlight bulb, you need to identify the correct type and size. Here's how:
- Consult Your Owner's Manual: This is the best place to start. Your owner's manual should specify the exact bulb type and wattage for your specific riding mower model.
- Check the Existing Bulb: Carefully remove the old bulb and look for any markings indicating the bulb type (e.g., H3, BA15S, 1156). These markings are usually etched onto the base or glass of the bulb.
- Use Online Parts Finders: Many online parts retailers, like Madison Tractor Company, offer parts finders that allow you to search for the correct bulb based on your mower's make and model. Enter your machine's details to find compatible riding mower headlight bulbs.
- Measure the Bulb (If Necessary): If the markings are illegible or you can't find the information elsewhere, you can measure the bulb's dimensions (diameter, length, base type) and compare them to online specifications.
It's important to note the voltage of your mower's electrical system. Most riding mowers use a 12-volt system, but some older models may use 6-volt systems. Using the wrong voltage bulb can damage your mower's electrical system.
Riding Mower Headlight Bulb Replacement Steps
Replacing a riding mower headlight bulb is usually a straightforward process. Here's a step-by-step guide:
Safety First! Disconnect the spark plug wire before starting any electrical work to prevent accidental starting. Wear gloves to protect your hands.
- Access the Headlight Assembly: Depending on your mower model (John Deere, Craftsman, Cub Cadet, Husqvarna, Toro, Ariens, Murray, Hustler, Scag, Exmark, Ferris, Snapper, Simplicity, Dixie Chopper), you may need to remove a cover or panel to access the headlight assembly. Refer to your owner's manual for specific instructions.
- Remove the Old Bulb: Gently twist and pull the old bulb out of the socket. If it's a bayonet-style bulb, twist it a quarter turn and pull. If it's a wedge-style bulb, simply pull it straight out. If the bulb is stuck, try using a pair of pliers with a cloth to protect the bulb.
- Install the New Bulb: Align the new bulb with the socket and gently push it in. For bayonet-style bulbs, twist it a quarter turn to lock it in place. Ensure the bulb is securely seated in the socket.
- Test the New Bulb: Reconnect the spark plug wire and turn on the mower's ignition switch to test the new bulb. If it doesn't light up, double-check that the bulb is properly seated and that the electrical connections are clean and secure. If you are having starter issues, check out our article on riding mower starter replacement.
- Reassemble the Headlight Assembly: Replace any covers or panels that you removed to access the headlight assembly.
Pro Tip: Apply a small amount of dielectric grease to the bulb's contacts to prevent corrosion and ensure a good electrical connection. You can find dielectric grease at most auto parts stores.
LED Upgrade: Benefits and Considerations
Upgrading to LED headlight bulbs offers several advantages over traditional incandescent or halogen bulbs:
- Brighter Light: LEDs produce a much brighter and whiter light, improving visibility in low-light conditions.
- Longer Lifespan: LEDs last significantly longer than incandescent or halogen bulbs, reducing the need for frequent replacements.
- Energy Efficiency: LEDs consume less power, which can extend the life of your riding mower battery and reduce strain on the charging system.
- Durability: LEDs are more resistant to vibration and shock, making them ideal for the demanding conditions of lawn mowing.
Considerations When Upgrading to LED:
- Compatibility: Ensure that the LED bulb is compatible with your mower's voltage and electrical system. Some LED bulbs may require a resistor or other modifications to work properly.
- Polarity: Some LED bulbs are polarity-sensitive, meaning they only work when installed in the correct orientation. If the bulb doesn't light up, try reversing the polarity by rotating the bulb 180 degrees.
- Heat Dissipation: LED bulbs generate heat, and some require heat sinks or fans to dissipate this heat. Make sure the LED bulb you choose has adequate heat dissipation for your application.
If you're considering an LED upgrade, carefully research the available options and choose a reputable brand known for quality and reliability. Be sure to check the specifications and ensure compatibility with your specific riding mower model. Also, make sure your riding mower voltage regulator is in good shape to prevent issues after the upgrade. Don't forget to check other electrical parts like the riding mower ignition switch as well!
Troubleshooting Headlight Problems
If your riding mower headlights aren't working, here are some common causes and troubleshooting steps:
- Blown Bulb: This is the most common cause. Replace the bulb with a new one of the correct type and size.
- Loose Connection: Check the wiring connections to the headlight socket and the ignition switch. Ensure that all connections are clean, tight, and free of corrosion. Clean the connections with a wire brush or sandpaper if necessary.
- Faulty Wiring: Inspect the wiring harness for any signs of damage, such as cuts, cracks, or frayed wires. Repair or replace any damaged wiring.
- Faulty Ignition Switch: The ignition switch controls the power to the headlights. If the switch is faulty, it may not be sending power to the headlights. Test the ignition switch with a multimeter. See our guide on riding mower ignition switch replacement if needed.
- Faulty mower pto switch: Some mowers have a safety interlock that disables the headlights when the mower blades are engaged. If the mower PTO switch is faulty, it may be preventing the headlights from working.
- Faulty Voltage Regulator: An issue with your riding mower voltage regulator could also be the culprit. Be sure to check the output voltage to ensure it is within the proper range.
- Fuse: Some riding mowers have a fuse in the headlight circuit. Check the fuse and replace it if it is blown.
If you've checked all of these potential issues and your headlights still aren't working, it's best to consult a qualified mechanic.
Maintenance Tips for Long-Lasting Headlights
Proper maintenance can help extend the life of your riding mower headlights:
- Regularly Inspect the Headlights: Check the headlights for any signs of damage, such as cracks or chips. Replace any damaged headlights immediately.
- Clean the Headlights: Keep the headlights clean to ensure optimal brightness. Use a soft cloth and mild detergent to clean the lenses.
- Protect the Headlights: Consider using a headlight protector to shield the headlights from debris and damage.
- Store Your Mower Properly: When storing your mower for the winter, disconnect the battery to prevent it from draining. This will also help protect the headlights from damage.
By following these maintenance tips, you can help ensure that your riding mower headlights stay in good working condition for years to come.
Remember to also maintain other parts of your machine to keep it in excellent working condition. Madison Tractor offers belts, blades, spindles, pulleys, filters, spark plugs, bearings, and shear pins.
Shop Riding Mower Headlight Bulbs at Madison Tractor
At Madison Tractor Company, we understand the importance of having reliable equipment. We carry a wide selection of riding mower headlight bulbs and other electrical components for various brands, including John Deere, Craftsman, Cub Cadet, Husqvarna, and more. Shop our online store today and find the right parts to keep your mower running smoothly and safely.
🔍 Can't Find Your Part?
Use our AI-Powered Part Finder to search by your equipment's make, model, and what you need. It's the fastest way to find the exact part for your machine.
Try the Part Finder →Part of our comprehensive guide
Mower Electrical Parts Guide: Starters, Solenoids, Switches & More