








Riding Mower Aerator: Tow-Behind Plug Aerator
A tow-behind riding mower aerator can significantly improve your lawn's health by reducing compaction and allowing nutrients to reach the roots. Learn about the different types of aerators and how to properly use and maintain them with your riding mower.
Introduction to Riding Mower Aerators
A lush, healthy lawn requires more than just mowing and watering. Over time, soil can become compacted, preventing water, air, and nutrients from reaching grass roots. That's where a riding mower aerator comes in. Specifically, we'll discuss tow-behind plug aerators, a popular and effective way to aerate your lawn using your existing riding mower.
Recommended Parts for This Guide
1 part we recommend — in stock, ships fast, one-click add to cart.
🔍 Looking for a specific part? Try our AI Part Finder — tell it your equipment and what you need, and it will find matching parts instantly.
A tow-behind plug aerator attaches to the hitch of your riding mower and uses coring tines to remove small plugs of soil from your lawn. This creates channels for air, water, and fertilizer to penetrate the soil, promoting healthier root growth. While there are other types of aerators, plug aerators are generally considered more effective than spike aerators, which simply poke holes in the ground.
If you're considering adding a riding mower aerator to your lawn care arsenal, this guide will walk you through everything you need to know, from choosing the right aerator to proper usage and maintenance.
Choosing the Right Tow-Behind Aerator
Several factors influence the best tow-behind aerator for your needs:
Aerator Width
Aerator width should be chosen based on the size of your yard and the turning radius of your riding mower. Wider aerators cover more ground quickly but may be difficult to maneuver in tight spaces. Common widths range from 36 inches to 48 inches. Consider your landscaping when making this decision.
Number and Type of Tines
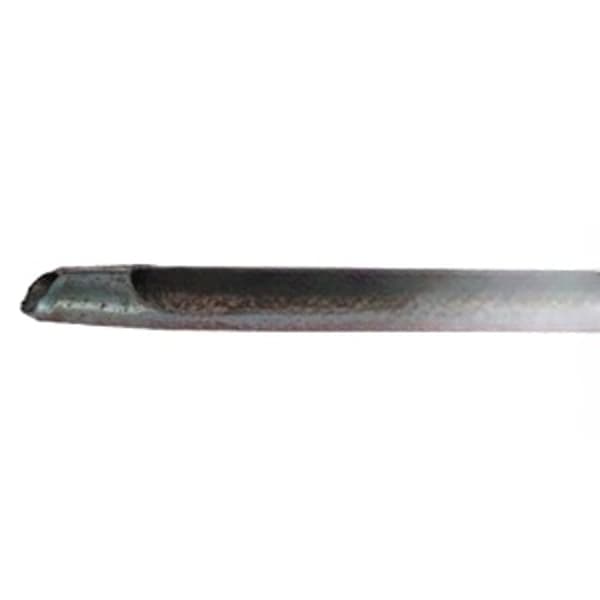
The number of tines determines how many plugs are removed per pass. More tines generally mean better aeration, but can also require more power from your riding mower. Tine material also matters; hardened steel tines are more durable and last longer. Also important, ensure the tines are easily replaceable. Check for availability of replacement tines for your specific model. Madison Tractor Company carries replacement tines for many models.
Aerator Weight
Weight is critical for effective aeration. Aerators that are too light won't penetrate the soil effectively, especially in compacted areas. Many tow-behind aerators have trays where you can add additional weight, such as concrete blocks or sandbags. Consider the weight capacity of your riding mower's hitch as well.
Compatibility with Your Riding Mower
Ensure the aerator is compatible with your riding mower's hitch. Most tow-behind aerators use a universal hitch, but it's always best to double-check. Consider the horsepower of your riding mower. A larger aerator with more tines may require a more powerful mower, such as a John Deere or Cub Cadet riding mower with a larger engine. If you have a smaller Craftsman or Murray mower, a smaller, lighter aerator might be a better choice.
Brand Reputation and Warranty
Choose an aerator from a reputable brand known for quality and durability. A good warranty can provide peace of mind in case of defects or premature wear. Brands like Agri-Fab and Brinly-Hardy are known for producing quality tow-behind aerators. We carry parts for many of these brands.
Preparing Your Riding Mower for Aeration
Before you hook up your new aerator, ensure your riding mower is ready for the task. This includes:
Checking Tire Pressure
Proper tire pressure ensures even weight distribution and prevents damage to your lawn. Consult your riding mower's manual for the recommended tire pressure.
Inspecting Belts and Pulleys
The increased load of pulling an aerator can strain your riding mower's belts and pulleys. Inspect these components for wear or damage and replace them if necessary. Madison Tractor Company carries a wide selection of riding mower belts and riding mower pulleys for most major brands, including John Deere, Husqvarna, and Toro. Remember to consult your mower's manual to find the correct part numbers.
Changing Oil and Filters
Fresh oil and filters help your riding mower's engine run smoothly under increased load. Now's a good time to replace the oil filter, air filter, and fuel filter.
Sharpening Mower Blades (Optional)
While not directly related to aeration, sharpening your mower blades before or after aeration ensures a clean cut and prevents tearing the grass, which can stress the lawn further. We stock replacement mower blades for all major brands, including Scag, Exmark, Ferris, and Hustler.
Using Your Tow-Behind Aerator
Follow these steps for effective aeration:
Watering Your Lawn
Aerating works best when the soil is moist but not soggy. Water your lawn thoroughly 1-2 days before aerating to soften the soil and make it easier for the tines to penetrate.
Adding Weight to the Aerator
Add weight to the aerator tray as needed to achieve the desired penetration depth. Start with a moderate amount of weight and adjust as you go. Avoid overloading the aerator or your riding mower.
Making Multiple Passes
For heavily compacted soil, make multiple passes over your lawn in different directions (e.g., north-south, east-west). This ensures more thorough aeration. Overlap each pass slightly to avoid leaving un-aerated strips.
Adjusting Speed and Depth
Adjust your riding mower's speed and the aerator's depth setting based on the soil conditions. Slower speeds and deeper settings are generally required for compacted soil. If the aerator is bouncing excessively, reduce your speed.
Cleaning Up
After aerating, leave the soil plugs on the lawn to decompose naturally. They will break down and return nutrients to the soil. You can also rake them in if you prefer.
Safety Warning: Always wear appropriate safety gear, including eye protection and hearing protection, when operating your riding mower and aerator. Be aware of your surroundings and avoid aerating near obstacles or slopes.
Maintaining Your Tow-Behind Aerator
Proper maintenance extends the life of your aerator and ensures optimal performance:
Cleaning
After each use, clean the aerator thoroughly to remove dirt, grass, and debris. Use a hose to wash off the tines and frame. Pay special attention to areas where soil can accumulate.
Lubrication
Lubricate moving parts, such as the tine axles, regularly with a penetrating oil or grease. This prevents rust and corrosion and ensures smooth operation.
Tine Inspection and Replacement
Inspect the tines regularly for wear, damage, or bending. Replace worn or damaged tines promptly to maintain aeration effectiveness. Check the manufacturer's instructions for the proper procedure for replacing tines. We carry a wide selection of replacement tines. Search our site for replacement tines specific to brands such as Ariens, Snapper, Simplicity, and Dixie Chopper.
Storage
Store the aerator in a dry, protected area when not in use. This prevents rust and corrosion. Consider covering it with a tarp or storing it in a shed or garage. Remove any added weight before storing.
Shear Pins
Some aerators utilize shear pins as a safety mechanism. If the aerator encounters a significant obstruction, the shear pin will break, preventing damage to the aerator or riding mower. Keep a supply of replacement shear pins on hand. Check your owner's manual for the correct type and size of shear pin for your model.
Troubleshooting Common Aerator Problems
Here are some common problems you might encounter and how to fix them:
- Aerator not penetrating the soil: Add more weight to the aerator tray. Ensure the soil is moist. Sharpen or replace worn tines.
- Tines breaking or bending: Reduce speed. Remove obstructions from the lawn. Use higher-quality replacement tines.
- Aerator difficult to maneuver: Reduce the width of the aerator (if possible, by removing outer tine sections). Ensure proper tire pressure on your riding mower.
- Hitch issues: Verify that your hitch is appropriately rated for the aerator's weight and that it is securely attached to your riding mower.
Linking to Other Lawn Care Accessories
Consider using a riding mower bagger after aerating to collect thatch and debris that the aeration process brings to the surface. Explore our selection of riding mower bagger systems for various mower brands. For zero-turn owners, we also offer zero turn bagger options. Consider the impact of a bagger on your riding mower seat! A bumpy ride with a full bagger may warrant an upgrade. A good John Deere mower seat or Cub Cadet mower seat can significantly improve comfort.
If you prefer to return clippings to your lawn, consider a mower mulching kit.
Shop Riding Mower Parts at Madison Tractor Company
Madison Tractor Company is your one-stop shop for all your riding mower parts and accessories. We carry a wide selection of replacement parts for all major brands, including belts, blades, spindles, pulleys, filters, spark plugs, bearings, and shear pins. Browse our online catalog or contact our knowledgeable customer service team for assistance in finding the right parts for your needs. Whether you need parts for a Hustler Mower Seat upgrade or replacement tines for your tow-behind aerator, we've got you covered! You can also use our AI-Powered Part Finder to search for parts by your specific make and model.
Part of our comprehensive guide
Mower Accessories Guide: Seats, Baggers, Mulch Kits & More